

 10:56
10:56
 Vidi Okta Deadpool


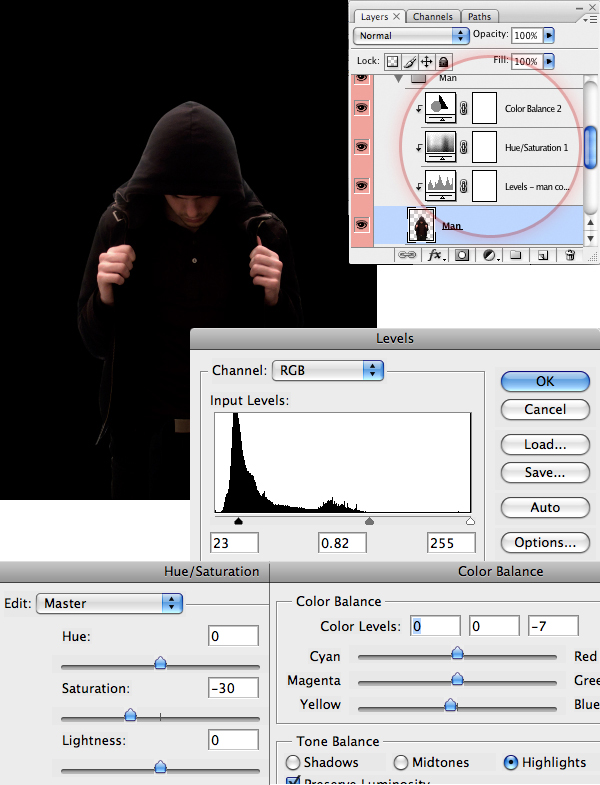
Step 3
Adjust the levels and colors of the image using the Adjustment Layers (Layers > Create New Adjustment Layer). Using Adjustment Layers gives us greater freedom in case we need to undo something later on. Make sure all the Adjustment Layers are just above the "Man" layer. Then select them all, and create a Clipping Mask by right-clicking on them, and selecting it from the menu.Use Levels to help create a darker, more subtle image. Also, use Hue & Saturation and Color Balance to subdue the colors and give the "Man" a tone with more yellow. Don’t worry if the image looks dark at this stage, just make sure the hands stand out.
Step 4
To give the image a more defined look, we are going to add highlights. Put the "Man" layer and its Adjustment Layers into a folder. Then duplicate it. Change the Levels on the new Adjustment Layer so that the edges of the man’s jacket are well defined.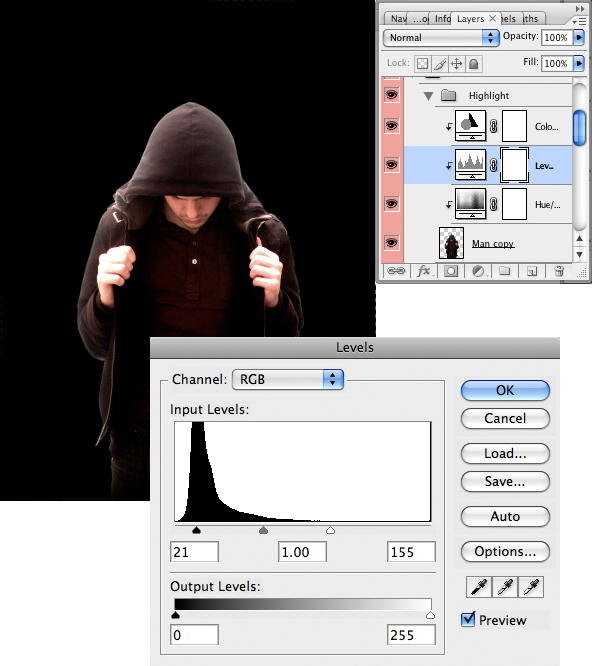
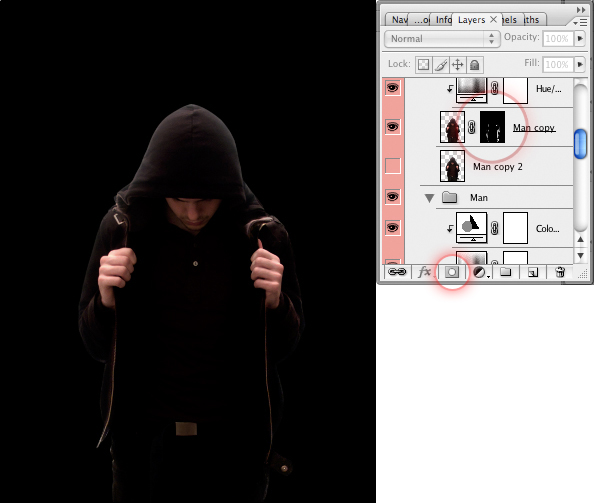
Step 5
Add a Layer Mask to the layer of the "Man" by clicking on the Add Layer Mask Icon at the bottom of the Layers Window. Make sure the Layer Mask is black (which will make the layer disappear).We are now going to bring out the highlights we want, which is mainly the prominent edges of the coat. Select the Layer Mask and draw over the parts you want to make brighter with a soft white brush.
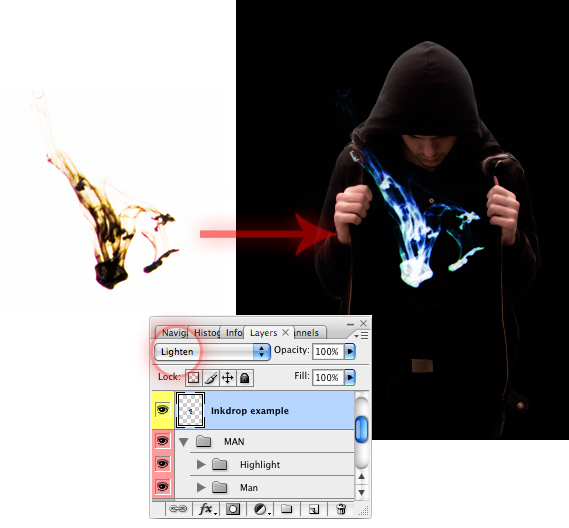
Step 6
Its now time to select the ink drops we want to use inside the "Man." This can be as intricate as you want, however try to have a good idea of what you want the final piece to look like before you start. Once you have found an ink drop you want to use, copy and paste it into the current document.Color doesn’t matter at this stage; just pick the ink drops that have the best shape. Press Ctrl+I to invert the image, as the ink drop image will be on a white background. Then in the Layers Menu, change the Blending Mode of the ink drop layer to "Lighten", and resize the layer as necessary.
Step 7
Once you’ve placed all your drops, make two folders called "Ink drop – Front" and "Ink drop – BG," as we want to give some simple depth to the ink drops. Carefully choose the ones you want in the foreground and the ones you in the background. Then put the layers in the corresponding folders. Now select the "Inkdrop – BG" folder, and set the Opacity to 60%.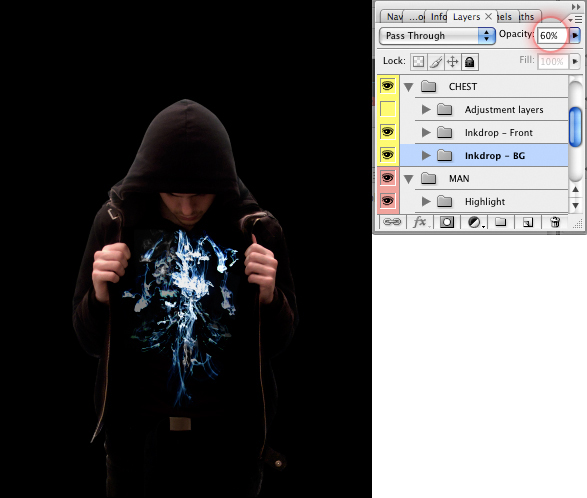

 Posted in: Tutorial Photoshop


0 comments:
Post a Comment